MARKS celebrates the beauty of human imperfections, encouraging a deeper sense of self-love and acceptance, while also critiquing the growing societal pressures that are further amplified by social media’s constant portrayal of unattainable perfection
☁︎ Don't fear technological advancements and evolution; embrace them and make the most of the opportunities they offer ☁︎
Moodboard

Trend inspiration

Creative reset
Minimalist and efficient designs will be coupled with a sense of fun, and fun will be coupled with severe intent as designers and brands align their creativity with a greater sense of purpose.The chaos of the past two years has seen creativity valued anew, both as a salve for stress and a solution for complex problems. By 2024, it will be an essential tool for businesses to adapt and succeed in a world of monumental challenges and opportunities.
Creative reset
Dada art movement and 2024's Energised! future driver lead the direction for this theme, which sees dopamine-inducing colours, prints and patterns add a maximalist touch to minimalist silhouettes.

Costumer profile

Demographics:
● Age: 25-35 years old
● Gender: Female
● Income Level: Annual income of around $100,000
● Location: Urban areas, cosmopolitan cities
Psychographics:
● Enjoys exploring modern fashion trends and unique styles.
● Actively shares personal fashion choices and outfits on social media platforms.
● Values individuality and self-expression through clothing.
● Seeks empowerment and positivity in personal and social spheres.
● Embraces diversity and celebrates imperfections as part of personal identity.
● Is inspired by projects that challenge societal norms and promote self-love.
Fashion Preferences:
● Open to bold and risky color choices, embracing bright and vibrant hues.
● Appreciates modern aesthetics with a preference for organic shapes and dynamic designs.
● Prefers versatile pieces that reflect personal style and celebrate uniqueness.
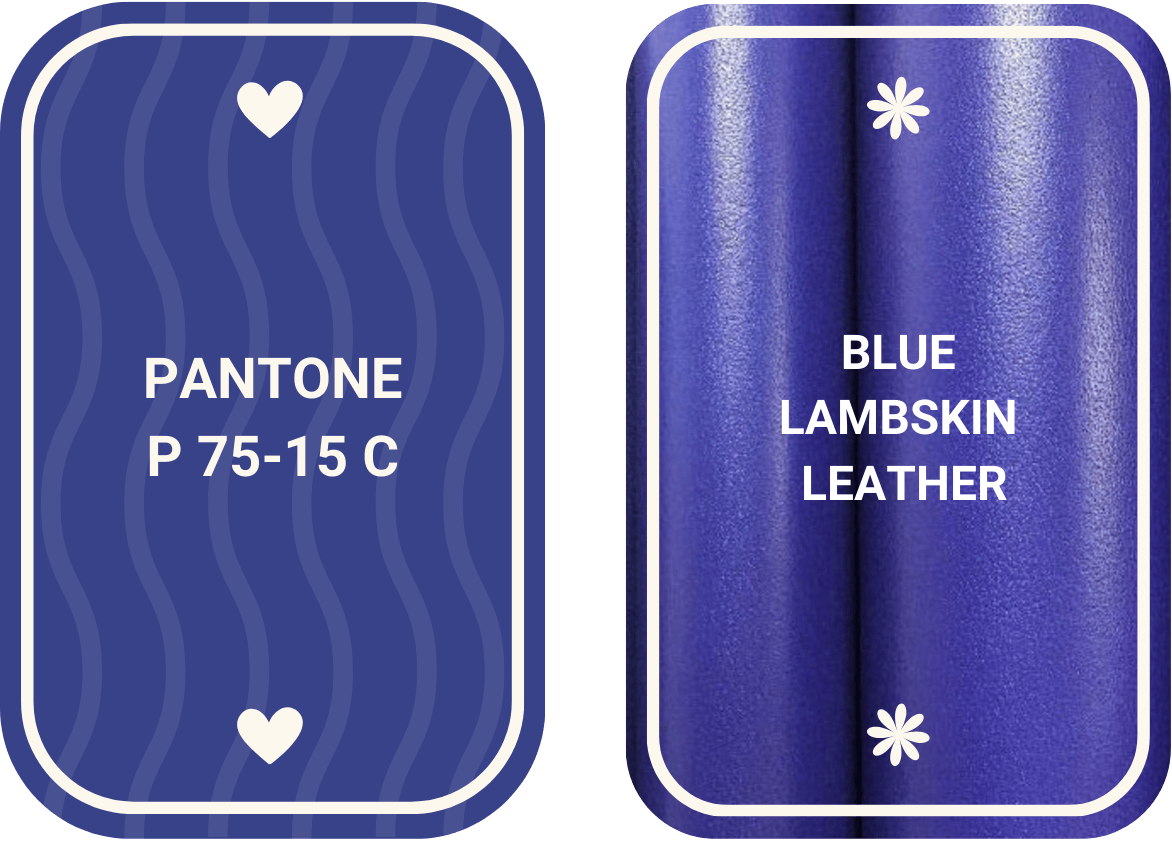
Color palette and materials


Sketching


.All products were initially modeled using Gravity Sketch before production, and the final heels featured 3D-printed components for enhanced design accuracy.

3D models

Both heels were crafted using 3D printing technology and then coated with leather.

Quick product
shots
shots

Scars making
process
process

1
Laser cut both the handle pattern and its reinforcement. The handle pattern (left) will serve as a guide for the full length of the handle and ensure precise placement of the scars and reinforcement in later steps. It features a -0.5 cm offset on both the outer edge and the scars, representing the seam allowance. The handle reinforcement (right) is laser cut without the outer allowance; however, the handle itself still includes a -0.5 cm offset, and the scars are not laser cut on this piece.

2
Laser-cut the leather bag handles to maintain the intended pattern size and aesthetic. The leather follows the full perimeter of the previously laser-cut Texon board pattern, without applying the negative allowance, and the scars are cut to their actual size, also excluding the negative allowance.

3
Laser cut the scar shapes three times from a 3 mm thick Texon board. These scars include a -0.5 mm negative offset to ensure a perfect fit inside the leather handle once it is wrapped in leather, as shown in Step 6.

4
Once the scars are glued together and fully dry, carefully carve them with a Dremel tool to create a smooth, rounded shape.

5
Glue the pre-rounded scars onto the reinforcement piece that was previously laser-cut. Use the guide from Step 1 to align them accurately—this ensures they will fit seamlessly with the leather handles in later steps.

6
Since the scars are highlighted in a different color than the body of the bag, cut a piece of leather large enough to fully cover them, and split it to a thickness of 0.5 mm.

7
Apply glue to both the surface of the scars and the back of the leather in the chosen contrasting color. Carefully attach the leather, then use a bone folder to press along the edges and ensure it fully adheres to the contours of the scars.

8
Ensure the scars align perfectly with the top leather, then proceed to glue the top leather in place to achieve the FINAL RESULT.

Product details

AI SHOOT


Technical specifications